blogspot visit counter

Wednesday 28 August 2013

How To Create A JSON Web Service In ASP.NET

How To Create A JSON Web Service In ASP.NET
Categories : -  How to create Ajax enable wcf web service in asp.net

Introduction : - 

 .ASP.NET makes it easy to create web services but they usually return XML. Like many web developers I now prefer JSON. This article and sample code will show you how to get your web service to return data in the JSON format.

Description : -

  For fetch the data from MySQL database using web service in asp.net json format  step as shown below.

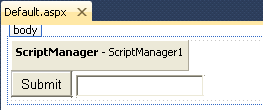
 Step :- 1 Create a new web site 
Step : -2 Write click on website and add new web service 
Step : -3 Write a code on WebService.cs file

as shown below


using System;
using System.Collections.Generic;
using System.Linq;
using System.Web;
using System.Web.Services;
using System.Web.Script.Services;
using MySql.Data.MySqlClient;
using System.Data;
using System.Web.Script.Serialization;
/// <summary>
/// Summary description for WebService
/// </summary>
[WebService(Namespace = "http://tempuri.org/")]
[WebServiceBinding(ConformsTo = WsiProfiles.BasicProfile1_1)]
// To allow this Web Service to be called from script, using ASP.NET AJAX, uncomment the following line.
// [System.Web.Script.Services.ScriptService]
public class WebService : System.Web.Services.WebService {

    public WebService () {

        //Uncomment the following line if using designed components
        //InitializeComponent();
    }

    [WebMethod]
    public string HelloWorld() {
        return "Hello World";
    }

     [WebMethod(Description = "Gets All Records.")]

       [ScriptMethod(ResponseFormat = ResponseFormat.Json)]

      public string GetAllRecords() {

          MySqlConnection objConnection = new MySqlConnection("server=localhost;User Id=root;database=databaseName;Pooling=false;Connect Timeout=10;Allow User Variables=True;");

          MySqlCommand objCommand = new MySqlCommand("SELECT * FROM info_tab  ORDER BY id", objConnection);

          DataSet objDataSet = new DataSet();

          MySqlDataAdapter objDataAdapter = new MySqlDataAdapter(objCommand);

           objDataAdapter.Fill(objDataSet, "reading");

           objConnection.Close();
             // Create a multidimensional jagged array
           string[][] JaggedArray = new string[objDataSet.Tables[0].Rows.Count][];

           int i = 0;

          foreach (DataRow rs in objDataSet.Tables[0].Rows)

          {

               JaggedArray[i] = new string[] { rs["user_id"].ToString(), rs["First_Name"].ToString(), rs["Last_Name"].ToString() };

               i = i + 1;

           }

             // Return JSON data

           JavaScriptSerializer js = new JavaScriptSerializer();

          string strJSON = js.Serialize(JaggedArray);

          return strJSON;

       }  

}
 
For Connect to my sql  use the Connector .MySql Connector Download Link is Click

Run your service and seen output like this


Click on  GetAlRecords


 Again Click on Invoke Button and output as shown below


Note : - In Connection String i am not use a password If you define a password at the time of installation of MySQL database then use password=y our password; in connection string

How to Change a Column Name in MySQL

How to Change a Column Name in MySQL
Introduction : -
In this article i am explain how i can change the column name of MySQL database table

Description :-

This is very to change the table column name in mysql database.
I have a info_tab (this is table name). And  id , user_id, Fisrt_Name, LastName

table as shown below


alter table info_tab change First_Name2 First_name varchar(30)

Here info_tab is table name 
First_Name2  is  old column name  which you want to change
Fist_Name Is new Column name  of the table

Friday 23 August 2013

Creating Ajax Enabled WCF Service in asp.net

Creating Ajax Enabled WCF Service in asp.net
Categories :- Introduction of WCF service , Advantages and Disadvantages of WCf  Service , Difference betweenWCF service and asp.net service

Introduction :- 

In my previous article i have explain to create restful wcf service api using post step by step .and i have also explained another example for create basic  wcf service step by step in asp.net. In this article, I will explain how to create an AJAX-enabled WCF Service and how to consume it using client-side script in an ASP.NET page. I have kept the example quiet simple so in order to keep our focus on creating and consuming AJAX Enabled WCF Services.

Description :-

AJAX-enabled WCF Service is a service that can be consumed using an AJAX client-side script.
I am using visual stdio 2010 for create a ajax enable wcf service in asp.net.This is very easy for create wcf enable service in asp.net.Follow the step for create a ajax enable web service in asp.net as shown below

Step 1 :-  Open Visual Studio 2010.    Go to File->New->WebSite     Select ASP.NET Empty WebSite

Step 2 : - Go to Solution Explorer and right-click.

    Select Add->New Item ,  Select WebForm ,     Default.aspx page open

Step 3 : -Define WCF Service :
 Go to Solution Explorer and right-click.
    Select Add->New Item ,  Select AJAX Enabled WCF Service ,  Define the Namespace

Step 4 :- Open Default.aspx page and click in [Design option].

 Drag and drop Scriptmanager Control  on the default.aspx web form. Image of form as shown below


Step 6 : -In [design] page right-click in scriptmanager control
Select Properties option
Define Services like this

Click the add option and select Service path like this

you can check this service on click on soure default.aspx design page


<asp:ScriptManager ID="ScriptManager1" runat="server">
            <Services>
                <asp:ServiceReference Path="ajax.svc" />
            </Services>
        </asp:ScriptManager>

Step7 : - You have already select AJAX Enabled WCF Service in your app_code folder .
select ajax.cs webservice and double click on code behind and write the following


  [ServiceContract(Namespace = "GreetNM")]
[AspNetCompatibilityRequirements(RequirementsMode = AspNetCompatibilityRequirementsMode.Allowed)]
public class ajax
{
    // To use HTTP GET, add [WebGet] attribute. (Default ResponseFormat is WebMessageFormat.Json)
    // To create an operation that returns XML,
    //     add [WebGet(ResponseFormat=WebMessageFormat.Xml)],
    //     and include the following line in the operation body:
    //         WebOperationContext.Current.OutgoingResponse.ContentType = "text/xml";
    [OperationContract]
    public void DoWork()
    {
        // Add your operation implementation here
        return;
    }
    [OperationContract]
    public string GetUser(string user)
    {
        return "Hello="+user;
    }
  
}


Here  GetUser is  method called GreetUser(string uname) which takes a username and returns a string with the “Hello” greeting appended to the user name. Decorate the method with the ‘OperationContractAttribute’ to indicate that the method is a part of the contract.

step 8 :-
Now add a Html Button, an HTML Input box and <Div> to the Deafult.aspx page.After renaming the controls and adding the onClick event of the button, the markup will appear similar to the following and image as shown above as step number 6


  <div id="ajax_wcf" title="getuser">
  
        <asp:ScriptManager ID="ScriptManager1" runat="server">
            <Services>
                <asp:ServiceReference Path="ajax.svc" />
            </Services>
        </asp:ScriptManager>
    <input type="button" id="ajax_wcf" onclick="return ajx_wcf_call()" value="Submit" />
    <input type="text" id="txtnm" />
    </div>

Java Script code :

Step 7 : Now go to Default.aspx page and select Design option.

    Click in the input Button
    Define Java Script code for the on click event

Code :


<script language="javascript" type="text/javascript">
        function ajx_wcf_call() {
            try {
                var greeto = new GreetNM.ajax();
                greeto.GetUser($get("txtnm").value, OnGeetingComplet, OnError);

            } catch (Error) {
            alert("Error");
        }
        }
  
    function OnGeetingComplet(result)
    {
        $get("txtnm").value = result;
        alert(result);
    }

    function OnError(result) {
        alert(result.get_message());
    }
  
    </script>

Compete code as shown below


  <html xmlns="http://www.w3.org/1999/xhtml">
<head runat="server">
    <title></title>
    <script language="javascript" type="text/javascript">
        function ajx_wcf_call() {
            try {
                var greeto = new GreetNM.ajax();
                greeto.GetUser($get("txtnm").value, OnGeetingComplet, OnError);

            } catch (Error) {
            alert("Error");
        }
        }
  
    function OnGeetingComplet(result)
    {
        $get("txtnm").value = result;
        alert(result);
    }

    function OnError(result) {
        alert(result.get_message());
    }
  
    </script>
</head>
<body>
    <form id="form1" runat="server">
    <div id="ajax_wcf" title="getuser">
  
        <asp:ScriptManager ID="ScriptManager1" runat="server">
            <Services>
                <asp:ServiceReference Path="ajax.svc" />
            </Services>
        </asp:ScriptManager>
    <input type="button" id="ajax_wcf" onclick="return ajx_wcf_call()" value="Submit" />
    <input type="text" id="txtnm" />
    </div>
    </form>
</body>
</html>

The result as for enter the value in text box and click on button


Download sample code attached


Wednesday 14 August 2013

Could not find file exception in asp.net fileupload

Categories : - Create and read XML file in asp.net  , Interview question and answer , Regular expression image validation , Regular expression text box validate for numeric value onlyCould not find file exception in asp.net fileupload

Introduction :-

In this article i am explain how to avoid error file cloud not find when upload any image in folder using asp.net web form .

Error As shown below


Description : - 

 In my Previous article i have explained how to upload  only image in .png,.jpeg format.  Now I am explain how to solve the server error could not find file when file is uploaded in image folder using file upload control of  asp.net.

Solution :- 

Use Server.MapPath for upload file in folder. Process for upload file on server side as shown below.

Create a  new  website and add new web Form .give the name to the web Form fileupload.aspx  .And drag and drop a new asp.net file upload control and asp.net button control. and double click on  button that means on code behind side write this code on button click event.


  protected void Button1_Click(object sender, EventArgs e)
    {
        string image1 = File1.FileName.ToString();
        string imgPath1 = "~/image/"+ image1;
        File1.SaveAs(Server.MapPath(imgPath1));
    }


 Here "~/image/" virtual path of the image  folder.


Download sample code attached


Friday 9 August 2013

How To Change Hyperlink Underline Color

Code To Change Hyperlink Underline Color

Code
<a href="change-underline-color.php" style="text-decoration: none; border-bottom: 1px solid #999999">change underline color</a>
Output
change underline color

Explanation -

1px = Variable border width in pixels which in this case is used as the hyperlink underline width.
solid = Border style.
#999999 = Color code. Use this variable to change the underline color. Replace this value with your choice of color codes. 

GridView Paging Not Displaying Data After Switching Page

GridView Paging Not Displaying Data After Switching Page
Categories : - The GridView 'GridView1' fired event PageIndexChanging which wasn't handled

Introduction : - 

In this article i am explaining how i can show GridView Paging Not Displaying Data After Switching Page. In my previous article i have explained Java script for gridview in edit mode , Gridview rowcommand object reference not set to an instance of object

Description : -

I am having a bit of trouble with Paging within a GridView grid I have set up. I have added the paging but whenever I click on the next page or the last page buttons, the page refreshes and displays blank
So Bind the  Gridview as show below


  protected void GridView1_PageIndexChanging(object sender, GridViewPageEventArgs e)
    {
        GridView1.PageIndex = e.NewPageIndex;
        BingGridViewData();//Call bind gridview function
    }


Create a new asp.net web site and add new page . Darg and drop gridview on page . and write this function on code behind of asp.net web page  as shown  below


protected void BingGridViewData()
    {
        _objcon = DonetionConnectionDB.GetConnection();
        DataTable dt = new DataTable();
        string query = "SELECT * FROM causes_tab order by ID DESC";
        MySqlDataAdapter _objda = new MySqlDataAdapter(query, _objcon);
        _objda.SelectCommand.CommandType = CommandType.Text;
    
        _objda.Fill(dt);
        GridView1.DataSource = dt;
        GridView1.DataBind();
        _objcon.Close();
    }


The gridview 'gridview1' fired event pageindexchanging which wasn't handled. c#

The gridview 'gridview1' fired event pageindexchanging which wasn't handled. Solution
Categories :-  Java script validation for Grid View in edit mode , Javascript validation for Gridview footer textbox  , Gridview RowCommand object reference not set to an instance of an object , onclick checkbox select data from gridview asp.net

Introduction  :-

In my previous article I have explained Gridview rowcommand object reference not set to an instance of object.  Now  i have  face this problem when i change the gridview AllowPaging="True" PageSize="1" .The Error message as shown below


 Description : -

Now i have a solution for this problem .
Select the Gridviw and click on PageIndexChanging Event of the Gridview and write a one line code as shown below


protected void GridView1_PageIndexChanging(object sender, GridViewPageEventArgs e)
    {
        GridView1.PageIndex = e.NewPageIndex;
        BingGridViewData();// GridView Paging Not Displaying Data After Switching Page
    }

Fired this event on code behind of the page and error is solved

Saturday 3 August 2013

Regular expression validator for image file extension

Regular expression image file extension

Introduction :- 
In this article i have explained how to validate image using Regular Expression Validator  in  asp.net  before upload in data base or image fonder.In my previous article  i have explained  Different Validation Control in asp.net Like this :- How to allow numeric values into textbox , How to upload multiple photo using asp.net , Asp.net Control With Example , Jquery form validation in asp.net , JavaScript validation for grid view footer textbox , JavaScript validation for grid view in edit mode

 Description :- 

 In this Post I have created a new  project and add use a Regular Expression Validator in asp.net as show below

step 1 -    Create a  new project .
Step 2 -   Write Click on project explorer and add a new form .
Step 3 -   Drag and drop a RegularExpressionValidator and file upload control on the page.
Step 4 -   Drap and drop a  button on the web  page for save the image on click button in the image folder.
Step 5-    Write Click and add new folder in your project.

Now set the property for validate the image using RegularExpressionValidator  as show below

Control to validate =FileUploade
Text = Invalid image icon
 ValidationExperssion  =^.*\.((j|J)(p|P)(e|E)?(g|G)|(g|G)(i|I)(f|F)|(p|P)(n|N)(g|G))$"

 Complete Code as show below


<head runat="server">
    <title></title>
</head>
<body>
    <form id="form1" runat="server">
    <div>
  
        <asp:FileUpload ID="File1" runat="server" />
        <asp:Button ID="Button1" runat="server" onclick="Button1_Click" Text="Upload" />
        <asp:RegularExpressionValidator ID="RegularExpressionValidator1" runat="server"
            ControlToValidate="File1" ForeColor="Red"
            ValidationExpression="^.*\.((j|J)(p|P)(e|E)?(g|G)|(g|G)(i|I)(f|F)|(p|P)(n|N)(g|G))$">Invalide file !</asp:RegularExpressionValidator>
  
    </div>
    </form>
</body>
</html>


Output image as show below


Download sample code attached


Thursday 1 August 2013

How to Add Jump Breaks To Blog Post

Jump Break is a HTML tag which is used to create expandable post summaries in your blog posts, so longer blog posts will displayed in a smaller portion with a link to Read More. You can easily create jump breaks in your blog posts by using blogger's new Post Editor, without the need of any HTML knowledge. Before adding jump breaks in your blog post you must decide where you want to the jump breaks to appear with Read More option. So, here I am going to explain how to insert a jump breaks anywhere in your blog posts.
Related Posts Plugin for WordPress, Blogger...